 After the fiberglass cloth is on the boat, the process of building up the level of epoxy begins. It took about 3 coats to get the thickness up out of the cloth in all areas and begin to smooth out. The first couple of applications tend to take on the texture of denim. It then must be sanded smooth before the next coat is applied. Washing the boat between coats was done with a bit of dish detergent and some vinegar in warm water. After that a couple of rinses with wet toweling and a bucket of water to keep it rinsed out.
I decided to put a wood skeg fin down the center of  the bottom to provide directional stability. Reading on the Glen-L website there were builders that added them later due to getting stuck in wake troughs and having bad things happen. The alternative is a small metal fin in the center of the boat that is about 8" long and 4-5" deep, but these are prone to damage if a boat is beached or in shallow water. Since a wood skeg fin is also somewhat prone to damage, I read that white oak is a preferred material for it hardness and rot resistance.
 the bottom to provide directional stability. Reading on the Glen-L website there were builders that added them later due to getting stuck in wake troughs and having bad things happen. The alternative is a small metal fin in the center of the boat that is about 8" long and 4-5" deep, but these are prone to damage if a boat is beached or in shallow water. Since a wood skeg fin is also somewhat prone to damage, I read that white oak is a preferred material for it hardness and rot resistance.
I called up my friend Kevin, who is a timber  framer and asked if he had a bit of white oak. Since he wanted to see my boat, he offered the board as admission price. We thicknessed planed it and it was more than enough for the job. The skeg is about 5 ft long and tapers from 2" tall at the back to 1/2" at the front. It is held on with 5 - #10 x 2" long screws countersunk and plugged with white oak plugs. I tapered the trailing end to hopefully eliminate any water disturbance that might cause prop cavitation.
 framer and asked if he had a bit of white oak. Since he wanted to see my boat, he offered the board as admission price. We thicknessed planed it and it was more than enough for the job. The skeg is about 5 ft long and tapers from 2" tall at the back to 1/2" at the front. It is held on with 5 - #10 x 2" long screws countersunk and plugged with white oak plugs. I tapered the trailing end to hopefully eliminate any water disturbance that might cause prop cavitation.
The other finesse job needed was squaring up the bottom to transom corner to eliminate potential porpoising. I duct taped a board and clamped it to 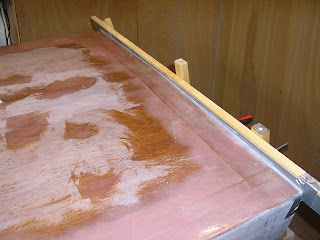 the transom to provide a dam for the epoxy. A batch of epoxy with microglass fibers was mixed up and squeegeed along the edge. After cure, it was sanded down to match with the bottom and transom surfaces leaving a very crisp corner.
 the transom to provide a dam for the epoxy. A batch of epoxy with microglass fibers was mixed up and squeegeed along the edge. After cure, it was sanded down to match with the bottom and transom surfaces leaving a very crisp corner.
Another coating of epoxy was needed and before the last couple of coats I actually read the bag that the foam rollers came in and they showed cutting rollers in half and then into three crescent shaped sections and using them as a touch off "brush" to smooth and take out surface air bubbles. It worked great and made the epoxy much smoother with fewer valleys, sags, ridges,  or surface bubbles.

After several cycles of sanding, cleaning, and epoxying the boat does not look much different in pictures, but the smoothness and depth of the finish has improved.
I made a cradle for the boat to sit on once it is
flipped over. It can be seen leaning against the wall in the photo. Its all from 2x6 lumber, scribed to somewhat match the contours and will sit level. I drilled holes in the corners to accept some large casters that I bought about 30 years ago at an industrial resale shop. Thought they might  come in handy someday. Hope this is that "someday"! On garbage night I found a nice clean carpet remnant that I can "recycle" to cover the cradle to protect the boat bottom that hopefully will get painted soon.
The last photo shows a different view to see the skeg and the finish before I began sanding with 120 grit to flatten and get ready for painting.
 come in handy someday. Hope this is that "someday"! On garbage night I found a nice clean carpet remnant that I can "recycle" to cover the cradle to protect the boat bottom that hopefully will get painted soon.
The last photo shows a different view to see the skeg and the finish before I began sanding with 120 grit to flatten and get ready for painting.
After a complete sanding with 120 grit paper, it appeared that I may have sanded down to the fiberglass cloth in three spots. Since I won't have time to begin the painting for at least another week, I cleaned and put another coat of epoxy on the whole boat. Hopefully, the last one. The epoxy needs to fully cure for a week before painting, so it should be ready when I am.

No comments:
Post a Comment