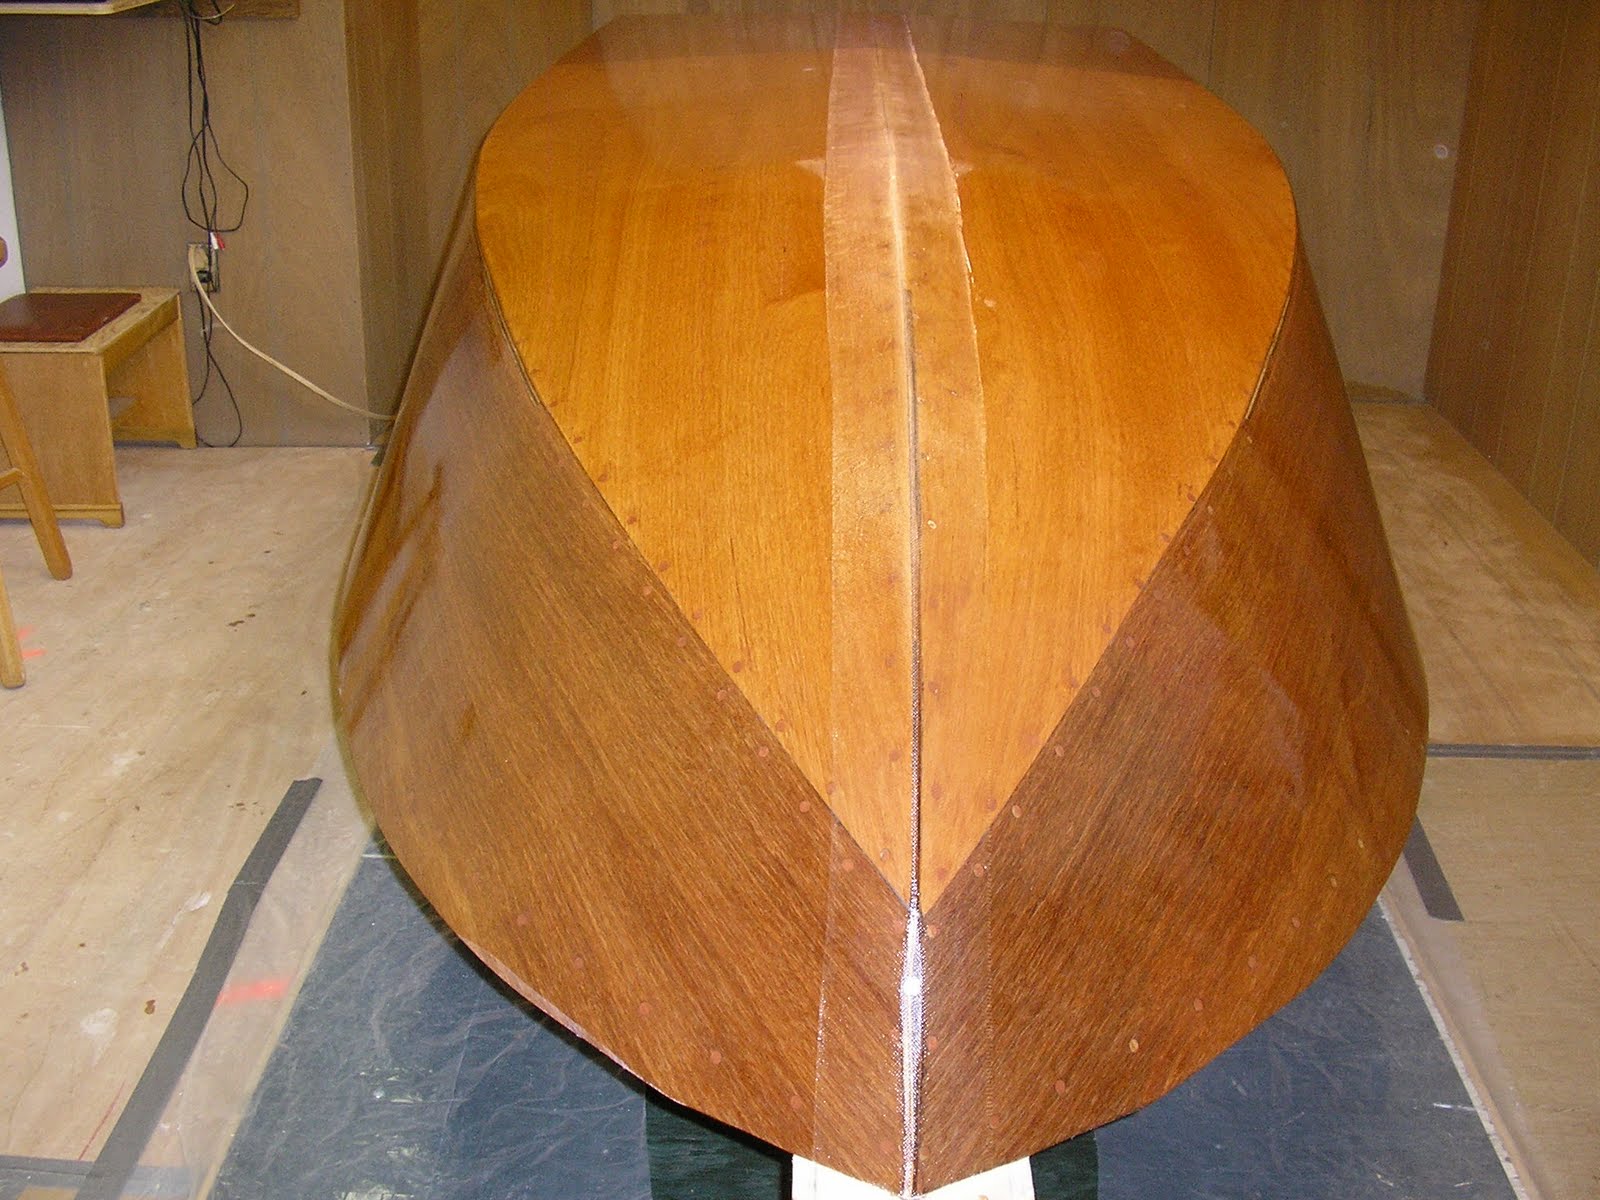
Once the boat looked all nice and shiny with perfect wood grain showing through the epoxy finish, it was time to mess it up...big time. So I fiberglass taped and epoxied the joints. I started with the keel joint and used 6" wide tape.
 The chine joints were taped and then the transom to bottom and sides were taped. Foam rollers were used to saturate the tape with epoxy. I found a 3" roller worked the best as quite a bit of rolling pressure is needed.
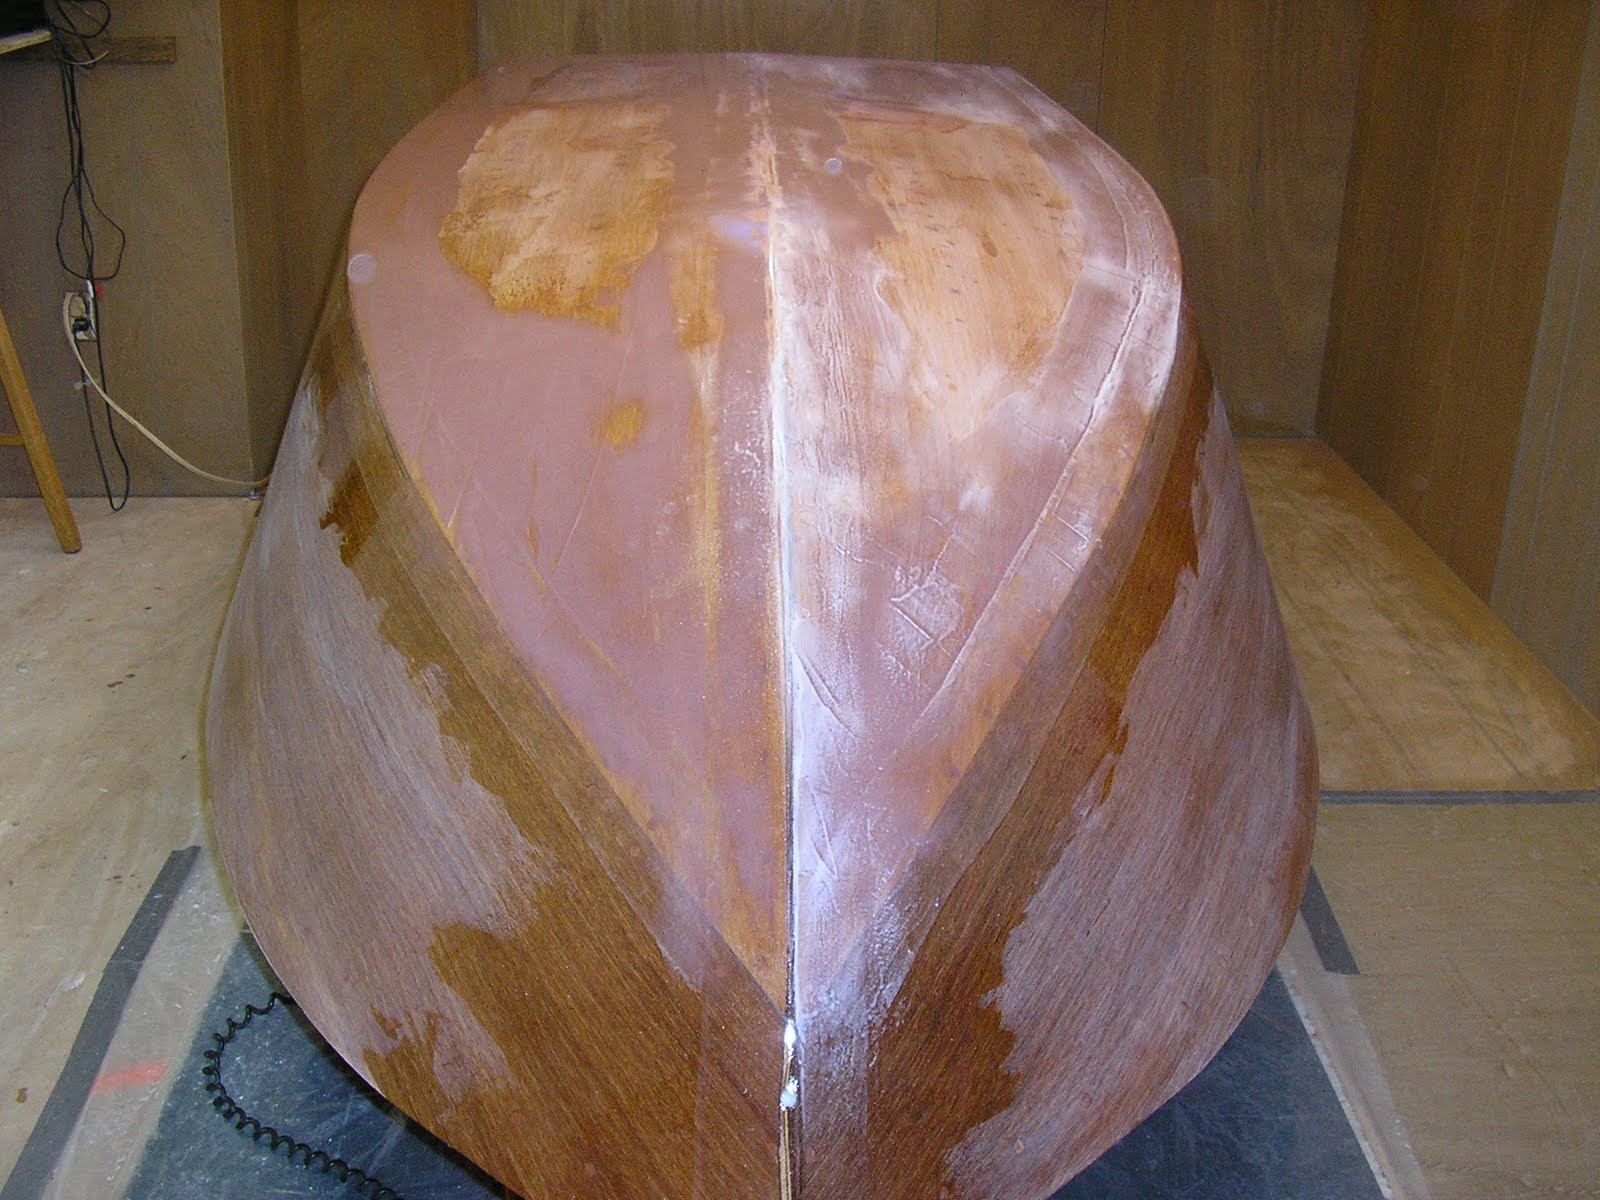
 After trying some different epoxy filler to fair in the tape edges and finding sanding difficult, I went and bought some West Systems 407 fairing filler. Since the bottom will be painted, I got over the need to keep the wood pretty and figured I may as well use the right stuff for the application at hand. This filler is supposed to be mohoghany color, but it reminds me of chocolate milk. I slapped it in the areas needed to smooth out the tape transitions and sqeegeed it into a somewhat smooth surface. After curing, sanding with an orbital sander and 80 grit paper worked well and edges could be feathered and surfaces smoothed quite readily. At some point in this process, my wife came down and said "What the Hell?". I quickly explained "It all gets painted later". So it all looked like hell, but was smoother. I kept with just clear epoxy on the sides so I can keep the natural finish, but unthickened epoxy runs and sags like crazy (after you leave the room - just to be sneaky) so its a bit of work to scrape and sand them out.
Then I fiberglassed the transom as suggested in the video to get some practice and confidence. The cloth was cut and taped in place to overlap the bottom by 1-2" and trimmed to fit over the sides a like amount. Corners were smoothed into shape without cutting. Epoxy was rollered in and it all went smoothly. After cure, the edges were sanded down to feather in.
 I then laid out the bottom fiberglass cloth on the bottom and trimmed to fit about an inch inside the chine line. My friend Ted said he kept all the cloth overlaps on the bottom of his boat and it simplified the feathering process, so I did mine the same way. I precut the cloth for the sides by splitting lengthwise some 38" wide cloth and rolled it up on shop vac pipes. My daughter's boyfriend, Brett was here for an Easter weekend visit, and since he has fiberglassed a boat before, he was drafted into service. We mixed epoxy, rolled it on the bottom and smoothed out any wrinkles and bumps. Brett mixed more epoxy batches, I rolled, and it progressed quickly. We then pre-coated a side and rolled out and positioned the cloth to overlap the bottom 2-3" and trimmed the ends as needed. We rolled on some more epoxy and worked it into the cloth and then did the final side. My daughter Katy joined in and we had three rollers going. It took about 1 1/2 hours to complete the job.
  After curing for a few hours, the fiberglass hanging over the edges was trimmed with a utility knife.
  It felt good to have this major step behind me. Thanks Brett!
No comments:
Post a Comment